9.12.2011
9.04.2011
3 Hour Modeling Project: Plasma Shotgun
While taking a break from school related modeling projects, I got to thinking about how to model and texture faster. I flipped through an old sketch book of mine and came across a few pages of weapon concept thumbnails.
I picked one, set my time limit to 3 hours, and got to work. There's a lot of room for improvement and detail, but this is what I accomplished in 3 hours : detailed the concept a little, modeled, and textured.
I found it a helpful exercise to force me to be more economical in my modeling and texture processes.
The results of a 3-hour limit. Knowing that it's possible to complete this much in a few hours (albeit the model is not very complicated), I think I can greatly improve the results if I spent 1-2 full days on a small project like this.
I picked one, set my time limit to 3 hours, and got to work. There's a lot of room for improvement and detail, but this is what I accomplished in 3 hours : detailed the concept a little, modeled, and textured.
I found it a helpful exercise to force me to be more economical in my modeling and texture processes.
Diffuse Map - the longest part of the entire process.
Details in the normals were quickly painted in PSD
instead of built in a 3D package.
The results of a 3-hour limit. Knowing that it's possible to complete this much in a few hours (albeit the model is not very complicated), I think I can greatly improve the results if I spent 1-2 full days on a small project like this.
8.24.2011
8.19.2011
GAD 301: Alien Abduction Facility - 3D Models
Entry Ramp
The Entry Ramp is a short ramp that connects the human building facade to the alien facility within. There will also be a door in the door frame.
Entry Ramp
Transition / Waiting Room and the Strong Doors
There are 3 models here: the waiting room and two large doors designed to slide apart.
Transition / Waiting Room
Strong Doors
The Strong Doors separate the outside world from the inside of the alien facility. In texturing the two doors separately, I was not able to match the diffuse, normal and specular maps. I have since improved my process to match the textures (as seen in the models below), and I will re-texture the doors to match.
Sanitation Hallway
This area is made up of 6 models: the Sanitation Entry Wall, the pod, the wall that holds the pod (includes floor), the ceiling, and the glass in the pod and the glass on the floor.
Sanitation Hallway Entry
The follow models are modular and are repeated in the level. I created 3 sets of textures for each mesh so that textures are less repetitive.
Sanitation Wall, Floor, and Ceiling (2 models)
The floor part of this model is also the ceiling of the hallway below it (bottom render image in the presentation board). Also, the floor/ceiling area is partly glass, so the player can peek at the Stasis Hall below. (Model for this area are not complete at this time so they have no texture information in the renders above. The textures for the glass floor areas are not complete.)
Sanitation Pod
Like the sanitation wall and ceiling meshes, the pod mesh has 3 different sets of textures. The textures for the glass mesh are not complete (maps are not shown).
If I have enough time during the project, I will add some bodies hanging in the pods.
8.15.2011
GAD301: Alien Abduction Facility - Specular Patterns in Textures
OVERVIEW
Thinking of ways to treat the visual transition from the "human" environment into the alien environment of the facility, I messed around with giving some interests to smooth metal textures. I put a pattern onto the specular map of the "Transition Room", the first alien space experienced in the level.
RENDERS
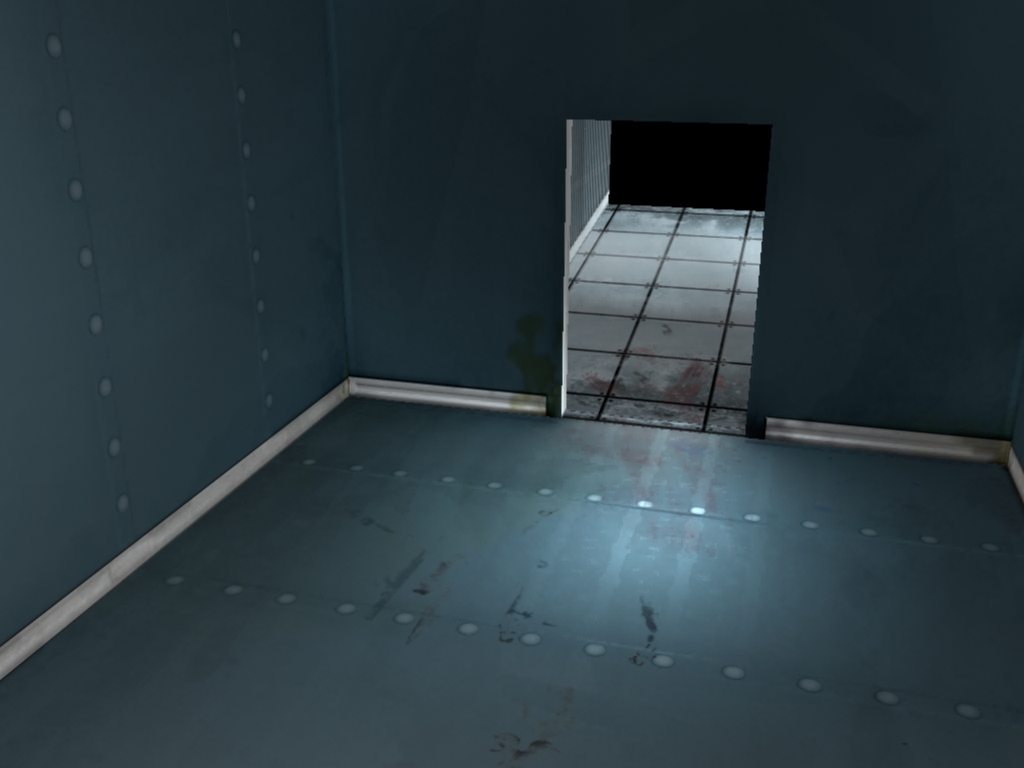
The ramp going down into the Transition Room
The surfaces of the Transition Room have a specular pattern on it that is seen from certain angles. Watch it in action in Maya.
SOME TEXTURE MAPS
Thinking of ways to treat the visual transition from the "human" environment into the alien environment of the facility, I messed around with giving some interests to smooth metal textures. I put a pattern onto the specular map of the "Transition Room", the first alien space experienced in the level.
RENDERS
The ramp going down into the Transition Room
Render showing ceiling details - Ramp to the Transition Room.
Render showing floor details - Ramp to the Transition Room (no door yet).
Specular pattern shown on the floor of the Transition Room.
The surfaces of the Transition Room have a specular pattern on it that is seen from certain angles. Watch it in action in Maya.
SOME TEXTURE MAPS
Diffuse map for the ramp room.
Diffuse map for the Transition Room.
Specular Map showing the pattern in the Transition Room surfaces.
8.07.2011
GAD301: Alien Abduction Facility - Sanitation Wall Unit
Presentation Board 17"x11"
This is 3 modular models combined into 1 wall unit. They are designed to line-up to make a hallway. The environment has dim red and yellow lights.
8.06.2011
GAD301: Transparency Texture Problem
OVERVIEW
I've been trying to get my version of UDK to display transparency correctly (or at least, the way I want it to display). After many hours of experimentation, this is what I've arrived at so far.
Using an alpha channel in the original 32bit Targa file did not work. I tried connecting the files alpha channel into the Opacity of the Texture Material in UDK, then messed around with the blend modes of the material. No good.
SOLUTION
Eventually, I tried the image below, as a separate texture connected to the Opacity of the Material. Then I set the following in the Material:
I'm also using a texture file with Color and Baked Lights combined. AO is kept separate. I may change to using an alpha channel of the diffuse as the AO later.
ISSUES WITH THIS METHOD
It's still not ideal and it still does not display the glass the way I want it to display.
First, I found that the image can only have pure black and pure white. Any gray in the texture map is turned to gray pixels in UDK.
Second, there is some magic number of minimum pixel width that is needed between the transparent areas. In my case, the line honeycomb lines are 5 pixels wide. These show up pixelated (much like how gray areas show up), and worse, while in game mode, the pixels flicker.
You can see some of the pixelation around the edges of the honeycomb lines in this close up. The lines in the actual texture are sharp and clean, however.
And lastly, because UDK seems to accept only black as transparent areas on a map, I am not able to show diffuse color information on the glass, such as smears and crud. There must be a way to at least get the AO map over the transparency areas.
I've been trying to get my version of UDK to display transparency correctly (or at least, the way I want it to display). After many hours of experimentation, this is what I've arrived at so far.
17x11 Presentation Board
Using an alpha channel in the original 32bit Targa file did not work. I tried connecting the files alpha channel into the Opacity of the Texture Material in UDK, then messed around with the blend modes of the material. No good.
SOLUTION
Eventually, I tried the image below, as a separate texture connected to the Opacity of the Material. Then I set the following in the Material:
BLEND_DitheredTranslucent, using an MLMPhong, and turn on 2-Sided.
Used for the transparency part of the pod.
I'm also using a texture file with Color and Baked Lights combined. AO is kept separate. I may change to using an alpha channel of the diffuse as the AO later.
ISSUES WITH THIS METHOD
It's still not ideal and it still does not display the glass the way I want it to display.
First, I found that the image can only have pure black and pure white. Any gray in the texture map is turned to gray pixels in UDK.
Second, there is some magic number of minimum pixel width that is needed between the transparent areas. In my case, the line honeycomb lines are 5 pixels wide. These show up pixelated (much like how gray areas show up), and worse, while in game mode, the pixels flicker.
You can see some of the pixelation around the edges of the honeycomb lines in this close up. The lines in the actual texture are sharp and clean, however.
And lastly, because UDK seems to accept only black as transparent areas on a map, I am not able to show diffuse color information on the glass, such as smears and crud. There must be a way to at least get the AO map over the transparency areas.
7.31.2011
GAD301: Alien Abduction Models with Textures
Overview
Sanitation Wall Unit and Sanitation Pod (empty). I had a lot of problems with Maya's normal and AO maps from its Transfer Mapping. I'll have to fix those later.
The sanitation pod has a transparent door area, however, there is no interior model at this time. Only the wall unit has diffuse, normals, specular, and AO applied to it. The center pod has only a diffuse map applied so far.
Texture Maps (2048x2048)
Maya 2011 seems to have trouble making useable normal and AO transfer maps.
I haven't finished hand painting the normals and AO maps for the pod model (since Maya's maps will not work). After those are complete, I can quickly make the specular map for this model.
Sanitation Wall Unit and Sanitation Pod (empty). I had a lot of problems with Maya's normal and AO maps from its Transfer Mapping. I'll have to fix those later.
The sanitation pod has a transparent door area, however, there is no interior model at this time. Only the wall unit has diffuse, normals, specular, and AO applied to it. The center pod has only a diffuse map applied so far.
2 models: wall unit and pod. Click image to enlarge.
Texture details. Click image to enlarge.
Texture Maps (2048x2048)
Maya 2011 seems to have trouble making useable normal and AO transfer maps.
Diffuse Map for the wall unit. There is a color palette along the top.
Wall Unit: This is the original AO map that Maya 2011 created for me...worthless.
Wall Unit: I used the bad normal map (with orange areas) with a hand painted normal map over it.
Wall Unit: This is the AO map I painted and used instead of Maya - takes too much time to make these.
Wall Unit: Specular map with a touch of green.
Sanitation Pod: Diffuse map.
Sanitation Pod: simple transparency map for the front door area of the pod.
I haven't finished hand painting the normals and AO maps for the pod model (since Maya's maps will not work). After those are complete, I can quickly make the specular map for this model.
7.20.2011
GAD301: Alien Abduction Facility - Buttress Models
Overview
The Physical Experimentation Room is a spiritual place for the aliens. Like societies that pray to a god for sacrificing animals for food and materials, the aliens view experimentation on the lesser species of our planet, including humans, to be necessary yet perhaps a little cruel. Thanks is given for the opportunity to use the bodies and spirits of the specimens experimented on, and proper respect must be shown.
Great alien buttresses encircle the Experimentation Room. They service several functions, both secular and scientific. Lights, power and materials funneled and vented into the room through the buttresses.
Buttress Models with support beams
The entire buttress system reached up 3 levels, with the first 2 levels filled with windows between each buttress. The third level creates a slanted ceiling.
Bird's Eye view of buttresses as arranged around the experimentation area
Human Eye view from within the experimentation area
Additional assets will be added, such as vents, ducts, lights and wires.
The Physical Experimentation Room is a spiritual place for the aliens. Like societies that pray to a god for sacrificing animals for food and materials, the aliens view experimentation on the lesser species of our planet, including humans, to be necessary yet perhaps a little cruel. Thanks is given for the opportunity to use the bodies and spirits of the specimens experimented on, and proper respect must be shown.
Great alien buttresses encircle the Experimentation Room. They service several functions, both secular and scientific. Lights, power and materials funneled and vented into the room through the buttresses.
Buttress Models with support beams
The entire buttress system reached up 3 levels, with the first 2 levels filled with windows between each buttress. The third level creates a slanted ceiling.
3 models shown: buttress, straight support column, and an angled support column
UVs for buttress (the sharp, angular part) (2048x2048)
UVs for straight support column (2024x2048)
UVs for angled support column
Bird's Eye view of buttresses as arranged around the experimentation area
13 buttresses encircle the experimentation area
Human Eye view from within the experimentation area
the space between the buttresses will be filled
with window sections on the bottom two levels
Additional assets will be added, such as vents, ducts, lights and wires.
7.19.2011
GAD301: Alien Abduction Facility Level - Corral Hallway Models and UVs
Overview
This area of the level is where humans and other animals are contained while awaiting experimentation by the aliens.
The upper hallway has a row of containment pods which hold and sanitize the specimens. Once the process is complete, the specimen is lowered within the pod to the lower hallway.
In the lower hallway, the specimen is hold in stasis until needed. This hallway leads to the Physical Experimentation room and the Destruction Room.
3D Models
Upper Level Corral Hallway Wall Unit (16' x 13.5 ')
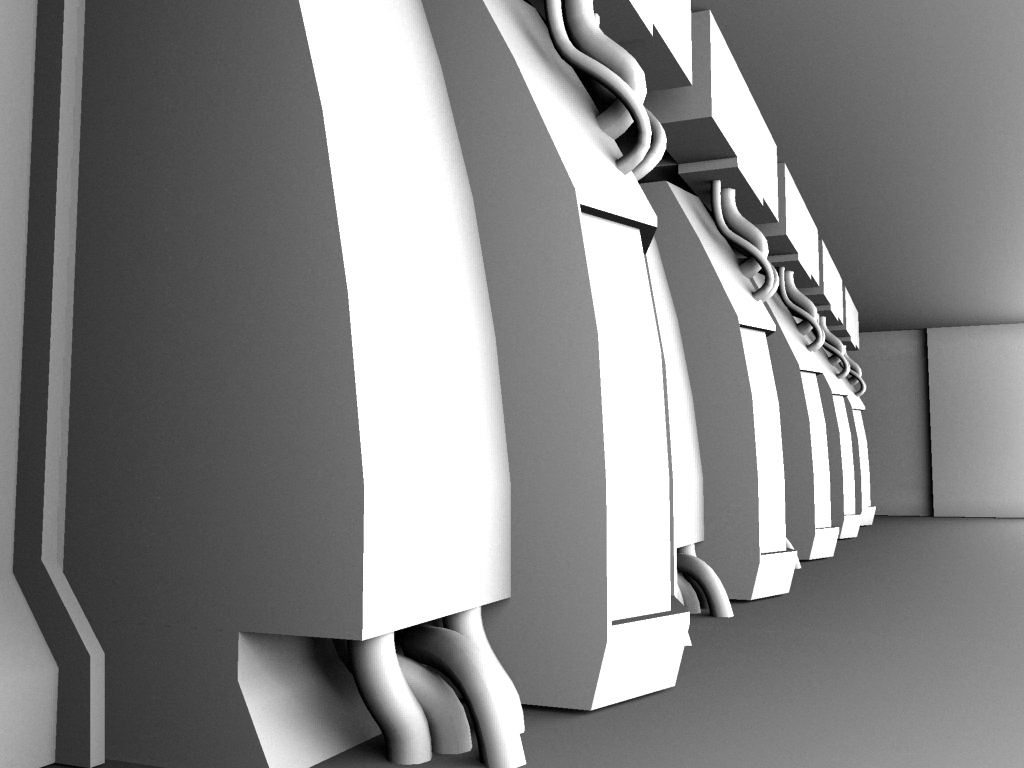
This render shows 4 models: The wall unit, the sanitation pod, and the left and the right sets of pipes (which will have different textures)
Upper Level Containment / Sanitation Pod
Lower Level Holding Hallway Wall Unit (16' x 13.5')
This render shows 8 models: the wall unit, the stasis pod, the 4 sets of pipes (same models as upper level), a large straight pipe, and a clamp for large pipes.
Lower Level Holding Pod
Combined assets showing half the hallway as it would be in the level
Upper Level - View from average human height
Lower Level - View from average human height
This area of the level is where humans and other animals are contained while awaiting experimentation by the aliens.
The upper hallway has a row of containment pods which hold and sanitize the specimens. Once the process is complete, the specimen is lowered within the pod to the lower hallway.
In the lower hallway, the specimen is hold in stasis until needed. This hallway leads to the Physical Experimentation room and the Destruction Room.
3D Models
Upper Level Corral Hallway Wall Unit (16' x 13.5 ')
This render shows 4 models: The wall unit, the sanitation pod, and the left and the right sets of pipes (which will have different textures)
4 models: wall unit, sanitation pod, 2 sets of floor pipes
UVs for the sanitation wall unit (2048x2048)
UVs for the sets of pipes (1024x1024)
Upper Level Containment / Sanitation Pod
sanitation pod
UVs for sanitation pod (2048x2048)
Lower Level Holding Hallway Wall Unit (16' x 13.5')
This render shows 8 models: the wall unit, the stasis pod, the 4 sets of pipes (same models as upper level), a large straight pipe, and a clamp for large pipes.
6 models: wall unit, stasis pod, straight pipe, pipe brace, 2 sets of pipes (same as above)
UVs for stasis wall unit (2048x2048)
UVs for straight pipe (1024x1024)
UVs for pipe brace (1024x1024)
Lower Level Holding Pod
UVs for stasis pod (20248x2048)
Combined assets showing half the hallway as it would be in the level
Upper Level - View from average human height
Lower Level - View from average human height
Subscribe to:
Posts (Atom)